It's taken me more that 2 months but I've finally finished it. Do you remember the stool I found in November at a yard sale? See my yard sale finds here. I knew you wouldn't recognize her. This neglected beauty needed a little care and after a little sanding, staining, painting and reupholstering she looks better than ever. Just look at those legs!
30 January 2013
28 January 2013
Ceiling Fan Makeover
The ceiling fan in our bedroom has light wood blades that do not match our bedroom furniture. I wanted a new ceiling fan but I didn't want to spend money on a fan. I would rather spend money on paint and pretty shiny things. I decided to paint it dark to match the furniture in our room.
25 January 2013
Be Mine!
Valentine Holder Craft
I haven't posted in a few days because my whole family is sick with the flu. I haven't had time to make a post or work on any projects. I managed to find time to try a few crafts yesterday. One was a fail and one turned out great.
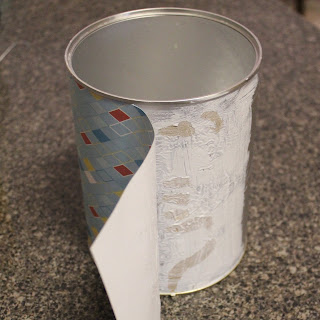
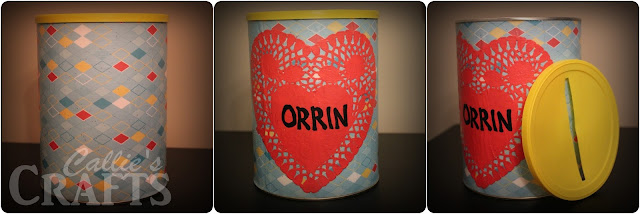
My son needs a Valentine Holder for his class party. I didn't want to spend any money (I can't really go to the store right now) so I used things I already had.
Paper Doile, 2 Sheets of Paper, Mod Podge, Empty Formula Can |
I brushed Mod Podge on the outside of the paper and applied the paper doilie. For the final step I brushed Mod Podge onto the outside of the doile. Adding Mod Podge to the outside of the paper creates a protective layer.
When It was dry I added his name and cut a hole in the lid.
Labels:
Crafts,
DIY,
Holidays,
Organization,
Tutourials
20 January 2013
Sandprint Shadow Box
This is a fun project to do the next time you're at the beach!
Items Needed:
Aluminum Cake PanSand
Sea Shells
Plaster of Paris
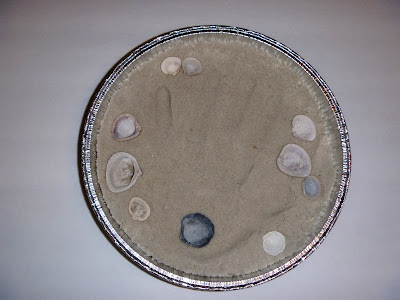
To make your own, one-of-a-kind "sandprint," place dampened sand in an aluminum cake pan, pressing down firmly. The sand should be deep enough to make your handprint. After making handprint, place various sea shells upside down, pushing firmly into the sand. The kids have a lot of fun using the beautiful shells they have found! Mix enough Plaster of Paris with water to make a mixture the consistency of thick cake batter (follow directions on box). Carefully pour into hand print and continue filling cake pan with about 1" of plaster. You need to work rather
quickly as the plaster can set up pretty fast. Let the plaster dry thoroughly before turning over to release.
My children's sandprints were mounted in a shadow box for a memorable display that I
proudly display in my hallway. To view my hallway makeover, click here.
Sharing At:
Labels:
Crafts,
DIY,
For the Home,
Tutourials
17 January 2013
Dollar Tree Valentine's Crafts
When I read that Debbiedoo's and Fox Hollow Cottage are hosting a Valentine's Party where all the crafts are made with items from the Dollar Tree I knew that I was up for the challenge. When I walked in the Dollar Tree my mind drew a blank and my creativity was gone.
(It didn't help that I took my 4 kids with me. Mom. Mom. Mom. MOM!)
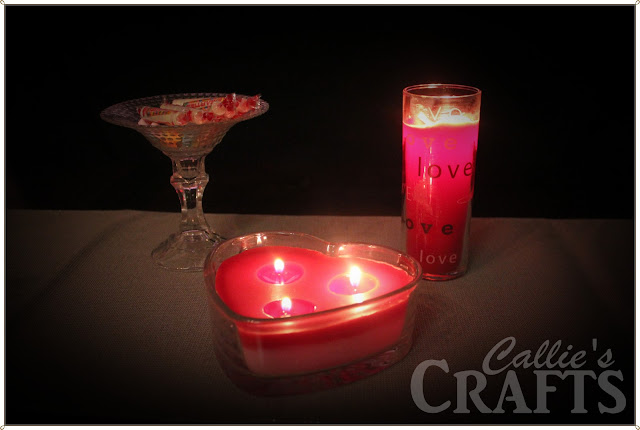
After browsing the whole store I went back to the candles and found these.
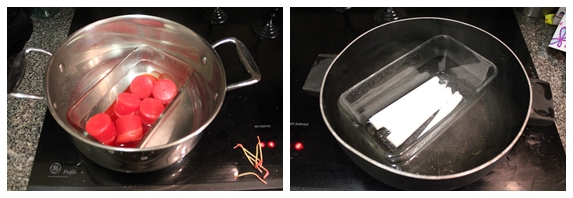
I melted the candles on the stove. I took the wicks out of the candles to use later. I used a few more red candles, I already had, to get enough wax.
For the heart shaped candle I poured the white first and added a little red to make pink. When It was dry I added the red to make a layered candle.
To make the tall candle I tied a string to the wick and wrapped it around a pencil to hold it upright.
I then poured in the remaining red wax.
For the next craft I glued a candle dish and a candle stick together.
They turned out beautiful and all for $6!
Sharing at:
Labels:
Crafts,
DIY,
Holidays,
Tutourials
16 January 2013
Hostess Aprons New to Etsy
I was working on this post when the batteries in my keyboard stopped working. I would like to write more but I am typing with a mouse and on screen keyboard.
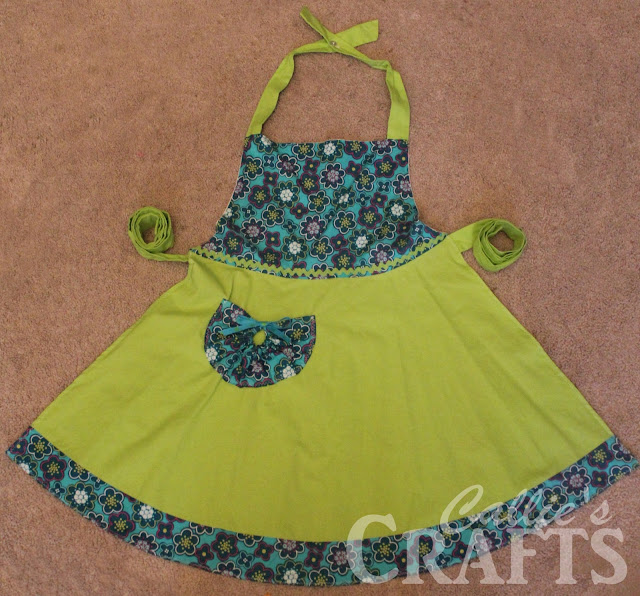
These are aprons I have made to sell locally. They are now available at my Etsy Shop too.
Hostess Apron : Lime Green and Teal Flower Stripe |
Hostess Apron : Teal and Pink Flowers and Lime Green |
Hostess Apron : Hot Pink with Zebra Pattern and Black and White Polka Dot |
Hostess Apron : Pink and Brown with butterfly print skirt |
Hostess Apron : Black and Purple |
14 January 2013
Kissing Ball
Turn your Christmas Sparkle Ball in to a Valentine's Day Kissing Ball.
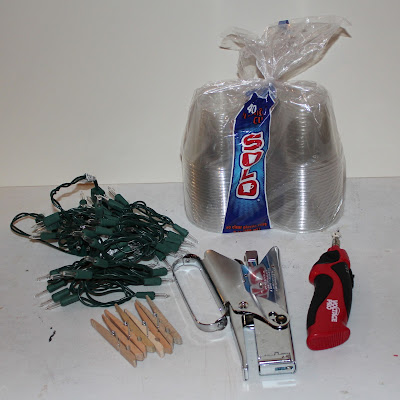
50 Clear Solo Cups
50 Christmas Lights
Clothes Pins
Staple Gun
Soldering Iron
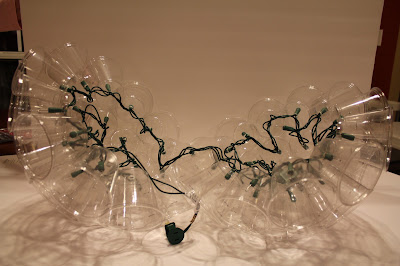
Use the soldering iron to make holes for the lights in the bottom of each cup.
Clip 12 cups together to create a circle. Then staple the sides of the cups together using 2 staples.
Repeat using 9 cups and then 4 cups. This makes half a ball. Do this again to make the other half. Insert one light into each hole.
Pin and staple the 2 halves together.
Decorate with a bow and hang in an entryway. Have fun this valentines.
XOXOXO
Sharing at:
Labels:
Crafts,
DIY,
Holidays,
Tutourials
11 January 2013
Hide Away Ironing Board
For our family there has never been the perfect place to iron. The ironing board was always left out and in the way. This year is going to be different thanks to my thoughtful parents. They gave us an in-wall ironing board for Christmas and I couldn't be more excited!
The ironing board folds down and there is also enough room to store the
iron. We chose to put it in our bathroom close to our closet for
convenience.
Subscribe to:
Posts (Atom)